What I learned from mastering an album

Fourteen tracks from a friend, a conversation that got real fast. That’s how this started.
I’ve been running my own mixes through different audio mastering setups for a while now. Producing, testing chains, swapping plugin order, getting feedback from other audio people who’ll tell me the truth. So when my friend mentioned he had a full album with no one lined up to master it, I said, let me take a shot. He makes underground goth rap with synthwave production, moody layers, and dark textures.
I sent back the first test track. His response: “Can you do 14 more just like that?”
Then he asked about vinyl.
I said yeah, I’d love to try. That’s the reason I’m writing this – not as someone with 20 years of audio mastering experience, but as someone neck-deep in the process right now, picking things up as the tracks come in.
Mixing and mastering are not the same job
The mastering chain is an opinionated topic among engineers and the mixing community. Everyone’s got a take. The traditional route says send your mix to a dedicated mastering engineer with the room, the gear, and the trained ear. Drop a thousand dollars or much more/less, depending on who. If you can swing that, do it. I’ve done it. I paid $400 on a past album, handed off the files to a professional, and it came back sounding great.
I know a lot more now than I did then. Mixed more sessions, listened with more intent, put in enough reps producing, to get things to a higher level.
The big difference between mixing and mastering comes down to scope. Mixing is the individual trees – EQ on the vocal, compression on the drums, panning decisions track by track. Mastering is the forest. You’re working with a stereo file and making moves that affect everything at once. Small moves. No big bold adjustments. There are exceptions, always, but the work is about restraint. A half-dB shelf here. A gentle tap on the compressor there. If you work in ad or sync, you really don’t have time to agonize over every 0.2 dB shift. You need to turn stuff around and make it sound as good as it can in a reasonable window.
That’s my approach right now. Has it changed from six months ago? Yeah. Drastically? No.
You catch something in an interview with an engineer you respect, you try it. If it doesn’t make a difference, you let it go. Pressure test every idea. With that said – here’s what I’ve landed on recently.
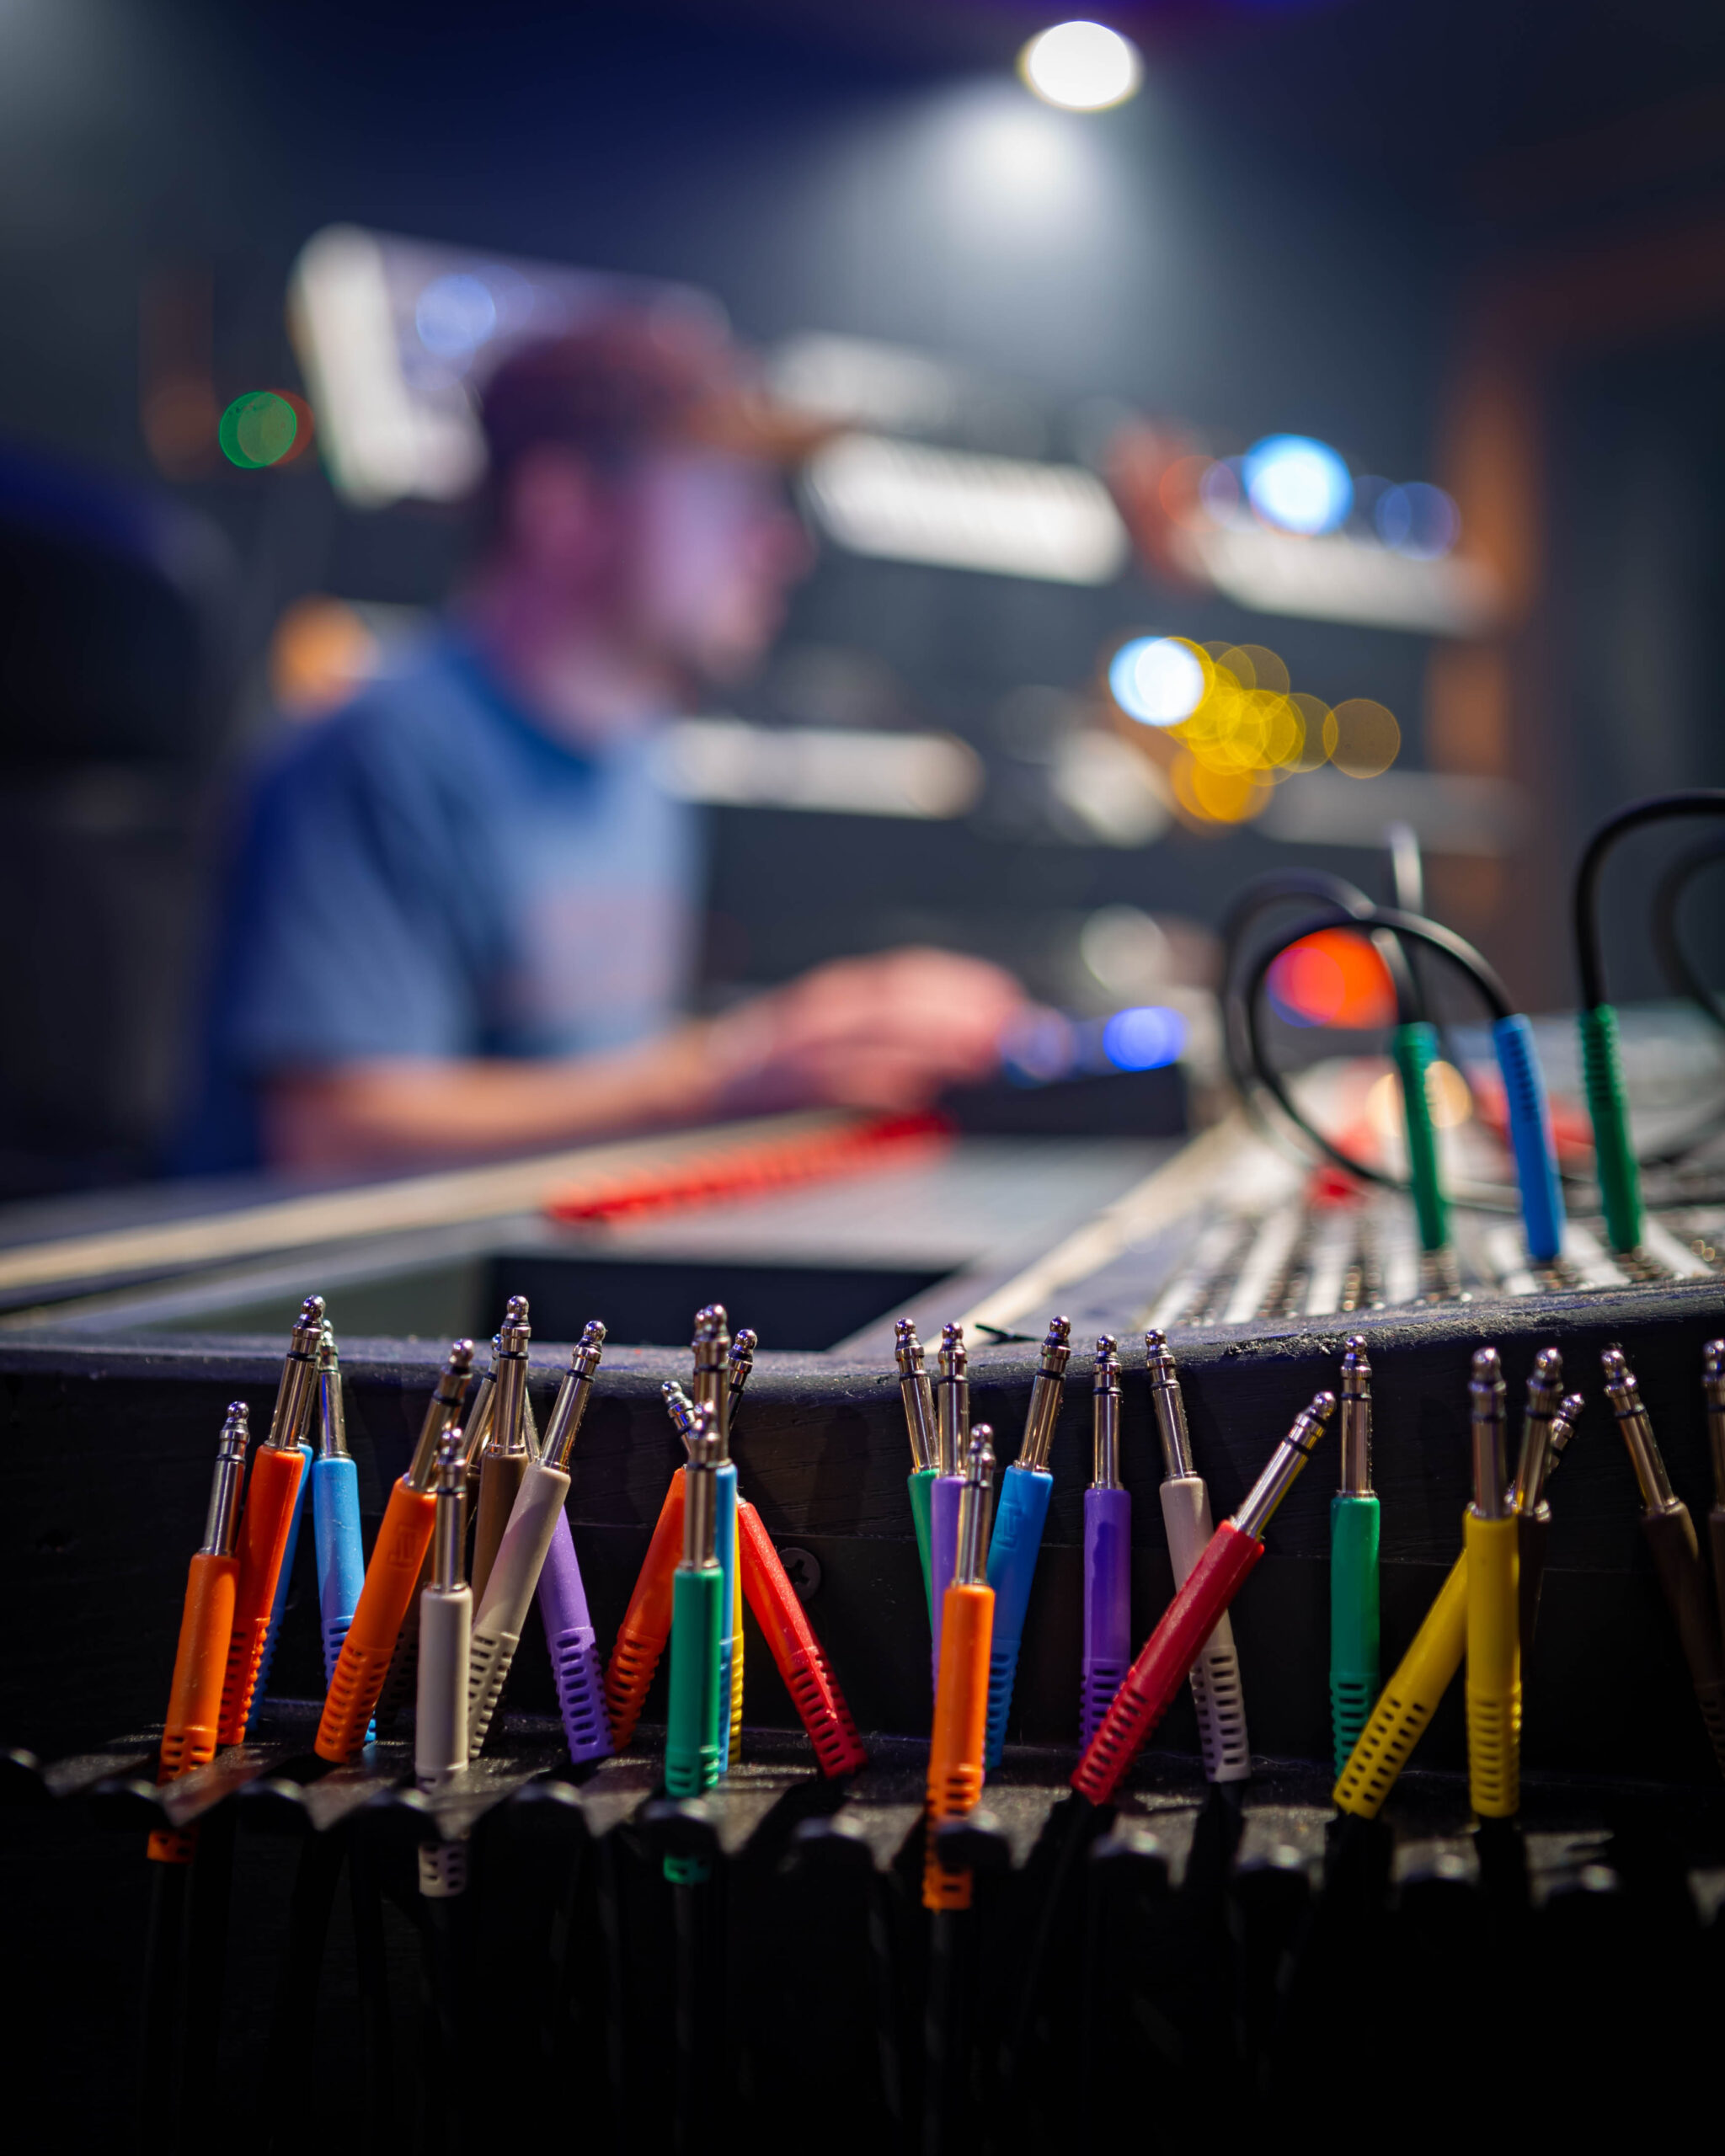
Nine plugins, one audio mastering chain
I run these in order. The sequence matters because each plugin feeds into the next, and swapping positions changes the outcome. This is where I’m at for this project.
The Amek EQ 250 was the first thing I got put onto, about a year and a half ago. It’s modeled after the Sontec MEP-250ex analog EQ, and the Mono Maker function is what I really love. It sums low-frequency content to mono, which isn’t optional if you’re prepping for vinyl. Wide bass below 125 Hz will wreck a cutting head. I throw a small shelf up around 18-20 kHz to open the mix up. Air, not aggression. But that little bit can add energy to the mix that is very welcoming to the ears.
After that, the SSL Master Buss Compressor. This is the glue. I lightly tap the needle, just enough to pull every element into one cohesive unit. Dre swears by this thing. Jaycen Joshua – three Grammys, credits on Beyoncé, Despacito, BTS – runs mixes through SSL buss compression. MixedByAli, who engineered Kendrick’s entire catalog as a protégé of Dre, built his sound around it. I’ve actually sat behind the real thing on an SSL 48-channel board in audio school. Something about the VCA circuitry holds a mix together in a way that even the plugin captures.
Then the Drawmer S73 Intelligent Master Processor. Analog-modeled multiband compressor that adds clarity, warmth, and definition without making things sound processed. I keep it on the gentle compression setting and never push the amount knob past 10%.
Subtle.
The God Particle gets less love than it used to. I went through a solid year, maybe two, where I leaned on it too hard. Now it’s more of a check-in tool – I’ll glance at my frequency balance across low, mid, and high to make sure my gain staging is right before moving forward. On most of this project, it’s been bypassed or sitting around 20-30% on the amount knob.
OTT stands for “Over The Top” for a reason. It’s touchy and a little goes far. I use it sometimes on the master bus to squeeze the mids a bit and help vocals sit tighter in the mix. 5% max for this project. Maybe less.
The Ozone Imager 2 is a one-knob stereo widener. Free, or part of the $99 suite. It adds that wide, panoramic left-right spread when a mix feels too centered. I don’t put it on every session and never push past 15%. Same idea as everything else in this chain – small touches that add up.
JST Clip is a clipper. When I want the mix to punch and bite like Mike Tyson, this is what pushes the signal. More gain, more aggression, fewer artifacts than a limiter doing the same thing.
The Waves L2 Ultramaximizer is the last line of defense. Audio goalie, if you will. A bit of compression, a bit of gain, and the headroom control I need to hit my loudness target. Clean, transparent. This is where I dial in the final LUFS number.
And the Youlean Loudness Meter 2 – free $99, this one doesn’t touch the audio. It just reads your integrated LUFS and true peak levels in real time. If you’re releasing through streaming platforms or pressing vinyl, you need to know these numbers.

What LUFS actually tell you
LUFS stands for Loudness Units Full Scale. It’s the standard for measuring how loud something actually sounds in digital audio – not just peak level, but what your ears register over time. Every streaming platform normalizes your track to a reference level. Master too hot, the platform turns you down. Too quiet, they bring you up. Either way, what you balanced in the studio gets shifted.
Spotify’s reference sits around -14 LUFS, but here’s the thing – it’s user-selectable between -19, -14, and -11 depending on the listener’s settings. Apple Music targets -16 most of the time. YouTube does its own thing. Deezer runs -15. There’s no single magic number, and any of them could change their reference tomorrow.
The better move is to master the track to where it sounds right and let the platform normalize from there. A solid master around -14 LUFS with a true peak ceiling of -1 dBTP works across the board. True peak matters because inter-sample peaks can clip during codec conversion – if you’re slamming 0 dBTP, the encoding to AAC or Ogg Vorbis introduces distortion that wasn’t in your original file. Don’t make this mistake!
You want between -1 and -2 dBTP. This is very important to state again. Digital clipping sounds amateur, painful for the ear, and makes you never want to play that song again. EVER
That’s where the Youlean meter earns its spot in my chain. Integrated LUFS for the whole track, short-term readings, true peak. No guessing.
And something that connects back to a piece of research I didn’t expect to care about from audio school- the Fletcher-Munson equal loudness curves from 1933. They proved that your ears respond to frequencies differently at different volume levels. Crank a mix, and the bass and highs seem full. Pull the volume down, and you lose both ends. Which means if you’re checking your master loud all session, your ears are lying to you about the low end and the top. I started checking every master at conversation volume. Changed my decisions more than I expected.
Check your mixes on different speakers
This is a big one. Mastering is all about translating audio over a variety of media. Airpods, nice speakers, shitty laptop speakers, clubs, car systems with 20″ subs, Beats headphones, and everything in between.
I’ve been checking on my studio Yamaha HS8’s, which I love for their warmth. The VSX Steven Slate Audio headphones are noteworthy, which do some great studio, club, car, and master room modeling. I enjoy the multi-room referencing while sitting in the same seat. Truthfully, I can’t say enough about these bad boys. If I could have only one of these options, it would be these headphones.
Lastly, I always check in the car. It’s a habit after 18 years of doing so; it never hurts.
Vinyl won’t let you fake it

This was the part I knew the least about going in. It changed how I think about the entire chain.
Digital formats don’t care if your bass is stereo. Vinyl does. When a lathe cuts grooves into a record, low frequencies create wide lateral movement in the groove wall. If those lows carry stereo information below about 150 Hz, the groove gets unstable. The stylus skips. The sound distorts. The cutting head can’t physically track it. That’s why the Amek EQ 250’s Mono Maker was the first thing in my chain. Everything below a certain threshold gets summed to the center.
Then there’s the RIAA equalization curve – the standard since the 1950s. When you play a record, your phono preamp flips that curve to get the balance back to normal.
Here is the deal for your master: if you’ve got too much high-frequency stuff, think piercing sibilance or those really bright, sharp cymbals, it just overwhelms the cutting head. The grooves end up getting way too tight and fast. At that point, the stylus can’t even track them properly. It’s a mess.
Honestly, it’s one of those things where less is definitely more. Or maybe it’s better to say that physical limits matter more than how “crisp” you want the mix to feel.
You’ve got to watch the high end. If you don’t, the needle will literally jump out of the groove. No one wants that.
Actually, it’s not just about the needle jumping; it’s about distortion too. That’s rare to hear on digital, but on vinyl, it’s brutal. It’s physics.
Loudness targets are a different conversation too. A master that’s been crushed to -8 LUFS for streaming is going to cause problems at the pressing plant. Vinyl needs more headroom, more room between the loud and the quiet (Dynamics), and a completely different relationship with your limiter than what you’d run for Spotify.
I’d be lying if I said I had all of this figured out. But getting the bass to mono, carefully controlling 10k + eq, and pulling back the loudness ceiling. These were the three biggest shifts between my digital masters and the vinyl prep on this project.
Mastering Challenges
I’d stop rearranging the chain so much in the first five tracks. I kept shuffling plugin order, looking for some perfect configuration. Once you’ve got a setup that sounds right, commit and work the project through. You can always revisit. The back-and-forth cost me hours I didn’t need to lose.
The album isn’t done yet. I’ve got tracks to close out and a test pressing to hear before I’ll know if my vinyl prep actually holds up on wax. That part still makes me nervous.
But that’s the gig. You take it, learn what you don’t know, and figure it out while the clock runs. Hope this helps!
If you are looking for more ways to stay creative, here’s my first post on Creative Commitment and The Artist’s Way.